Space:1999 Stun Gun v2.0

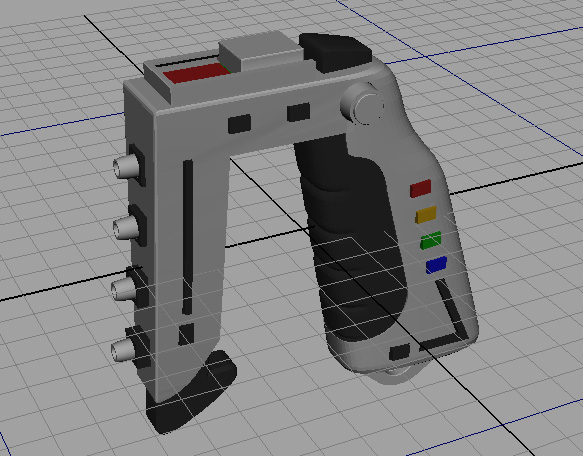
After printing the first version of the Space:1999 Stun Gun I noticed a few issues.

OLYMPUS DIGITAL CAMERA

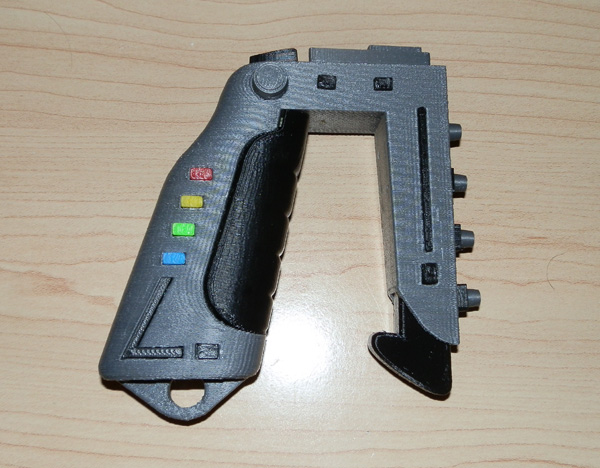
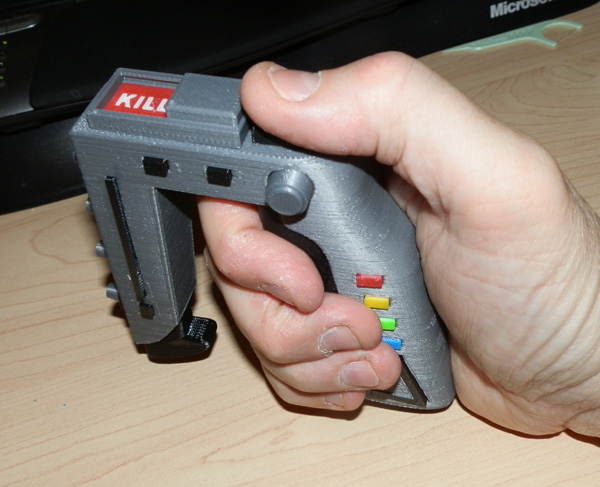
First, the front bar was too short. The silver part should dip down to about even with the bottom of the hand grip. The black pommel should protrude below.

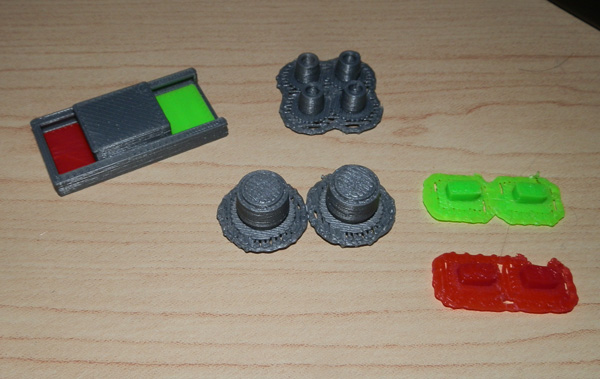
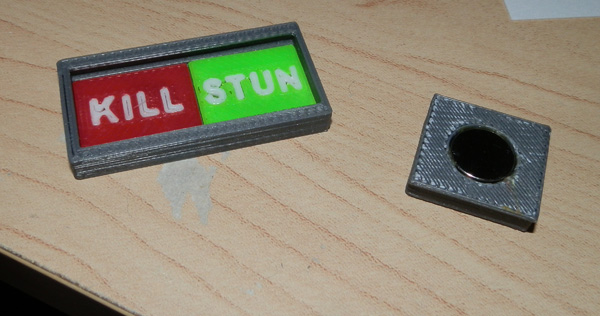
There were other issues including the switch length, the panels for KILL and STUN which I decided to do using inlaid text on red and green plates which has the letter spaces cut out to allow white printed letters to be put in place.

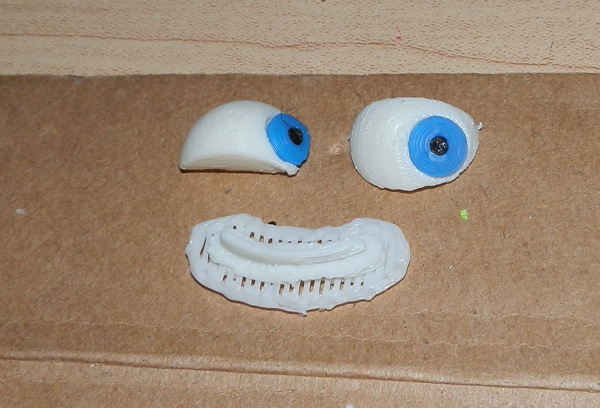
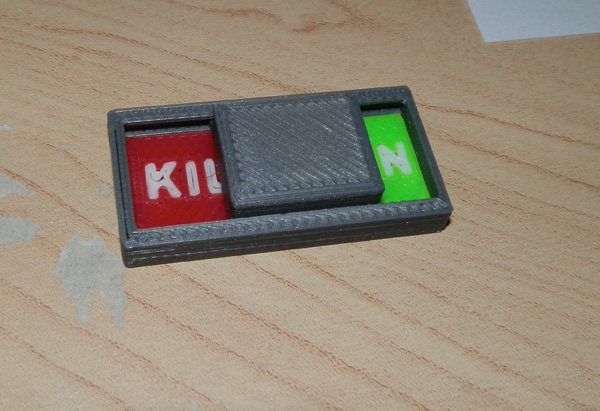
Here is the switch assembly in parts:

OLYMPUS DIGITAL CAMERA

The letters do this odd thing whenever my Afinia tries to print small solids. If they get too small, the Afinia seems to print the outer edges without trying to fill the interior until the letters get big enough and then they print rather better.

But these letters are TINY! And here they are glued into their slots.

The switch, seen here upside down, has a cup modeled in it to hold a rare earth magnet that’s about .95cm in diameter.

Here, the magnet is in place, resting on the two colored panels, sealed in by the switch’s rails.

OLYMPUS DIGITAL CAMERA

Then I put two more rare earth magnets in the main gun body, one underneath the “KILL” and one underneath the “STUN” panels.

OLYMPUS DIGITAL CAMERA

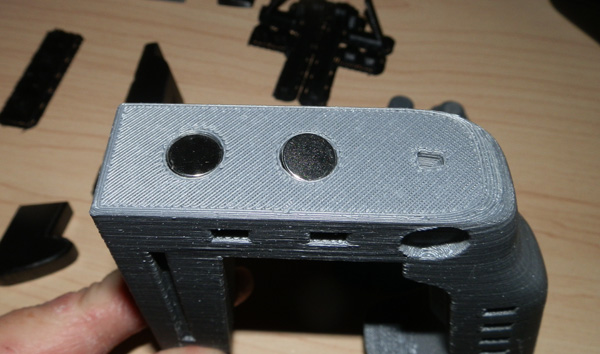
I then glued the switch housing in place on the top of the gun, sealing the magnets in place. Then I glued a magnet into the switch’s slot and shoved the switch into the rails of the switch housing.

When fully assembled, the switch does a very strong “snap” from one setting to the other because the magnet in the switch is very strongly attracted to the closest magnet to it, whether that be the one under KILL or the one under STUN.

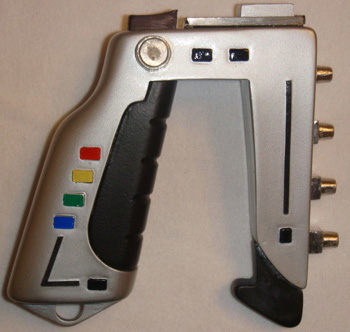
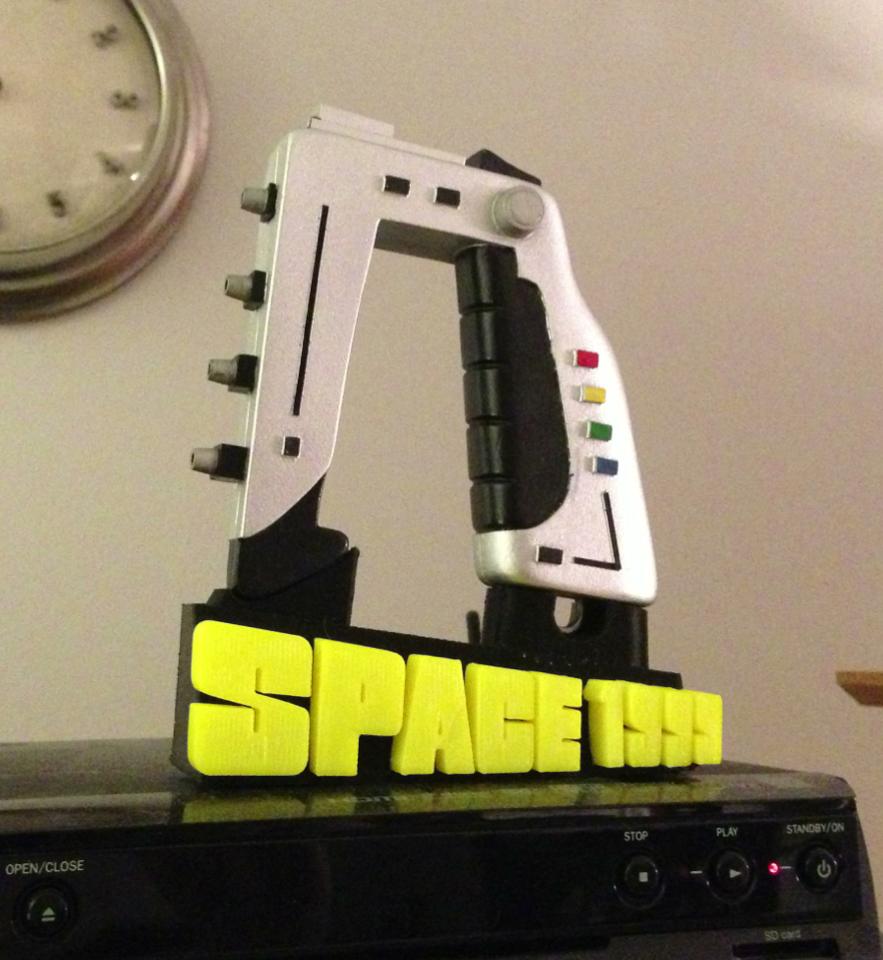
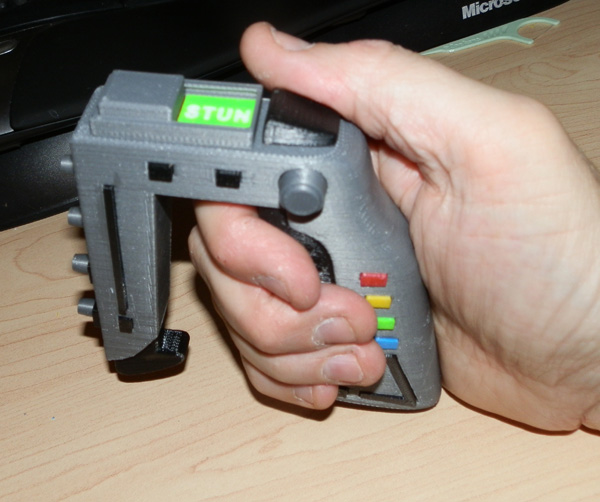
Here are some photos of the gun in my hand:

OLYMPUS DIGITAL CAMERA OLYMPUS DIGITAL CAMERA

Here is a short, poorly-lit video I did to show off the gun and its functioning switch.

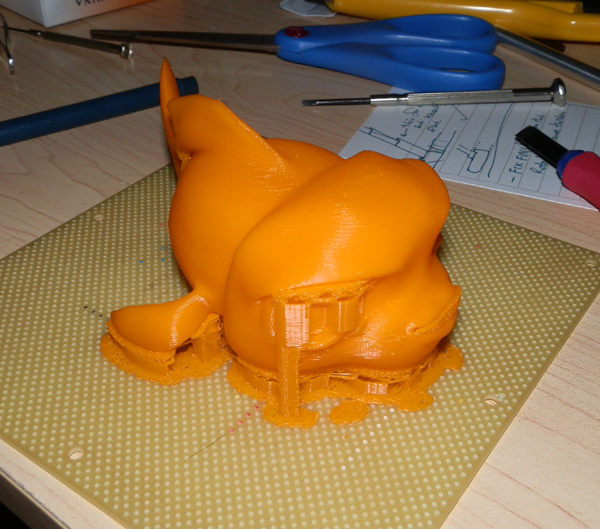
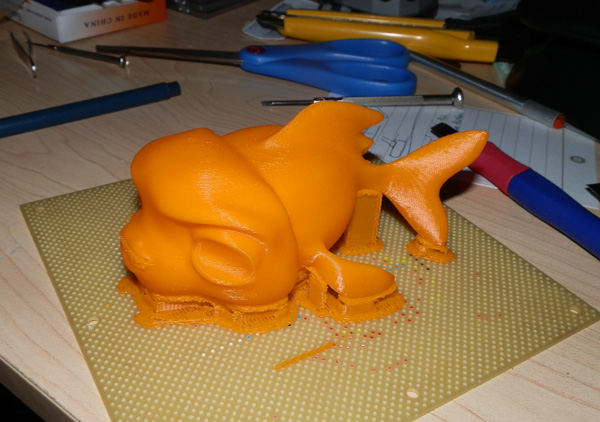
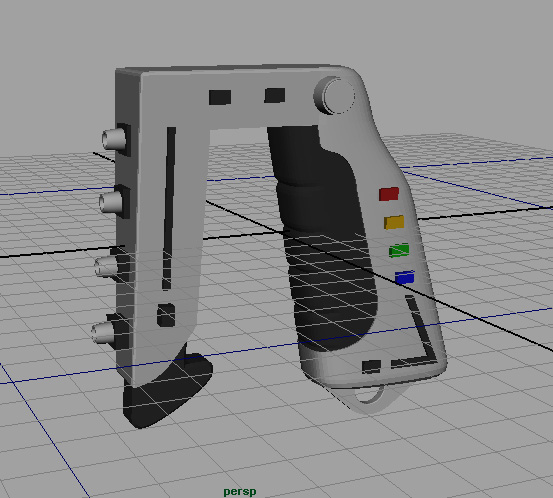
Here is a gun body hot off the printer:

OLYMPUS DIGITAL CAMERA

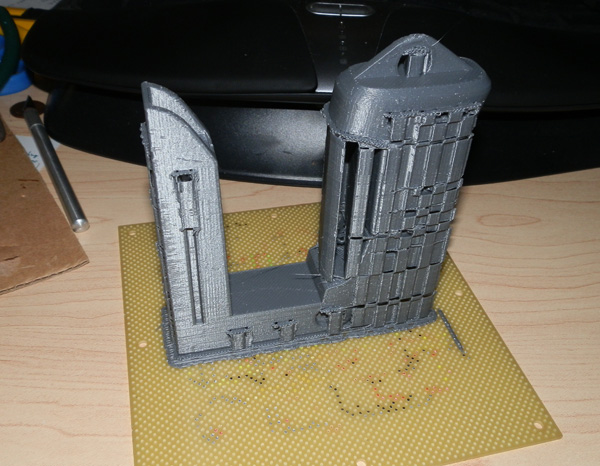
Note that it prints a fair amount of scaffolding material up the sides. This is there to build support for roof sections of the small holes I use to inlay the various pips on the gun. In a future version, I will try to model those with 45 degree slanted roofs to avoid scaffolding altogether.

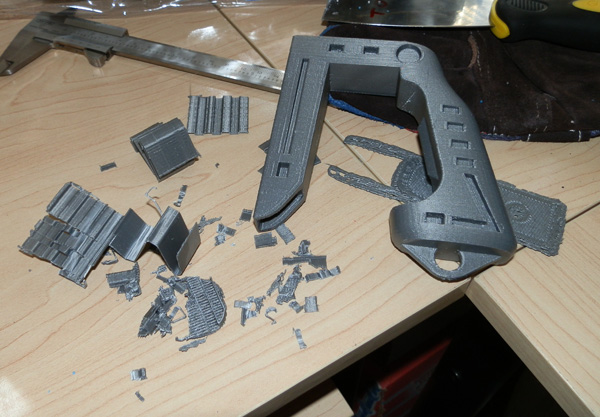
Here is some of the plastic I cleaned up:

OLYMPUS DIGITAL CAMERA

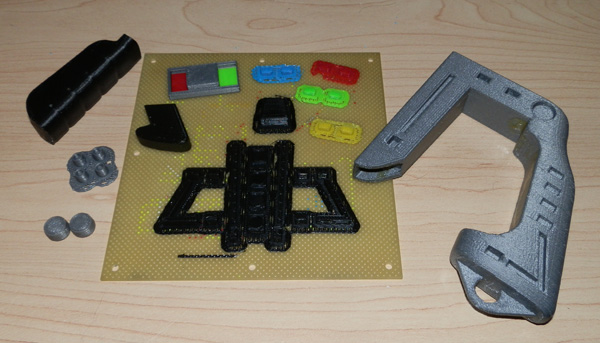
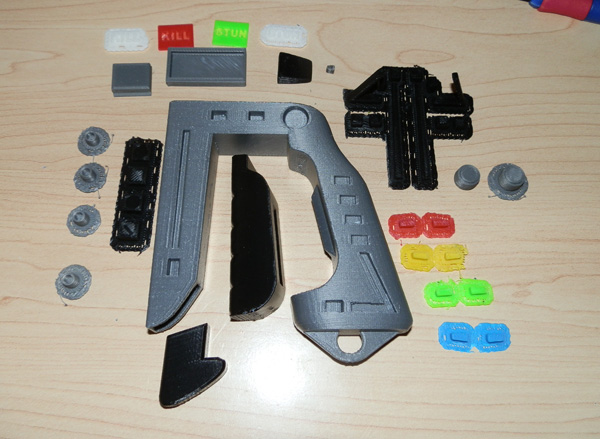
And here are all of the parts required to build one stun gun. If you count individual text letters, which I do, there are a total of 47 individual pieces, not including the 3 magnets I use to make the switch feel awesome to flip. (Some pieces are connected together in this picture by the rafting they are printed on. I did this to keep track of them. As the small black pips are very similar, I need the layout to remind me which is which.)

OLYMPUS DIGITAL CAMERA

What Now?

This gun is still a work in progress. I am very happy with the results, but because I wasn’t 100% happy with the silver filament, I’m planning on trying one in gray, but I don’t have any gray at the moment. I will try some later.

But besides that, I intend to make a Commander’s Special, which is my own variant which will be printed in white, with most of the rest being the colors you see here, with perhaps the exception of the switch housing and maybe the switch. Since white and yellow won’t necessarily read, I may change yellow to orange for the orange pips.

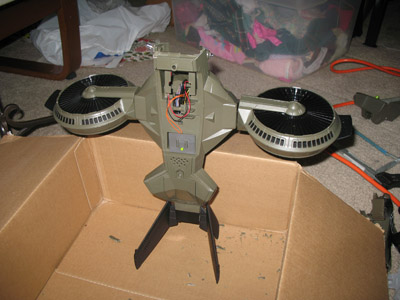
Also, one of the first things I get asked is “what’s that black thing in the bottom front.” I dont’ really know, but I always imagine it to be a removable battery or energy magazine. It’s never really referred to in the TV series. But if you bought the “Moonbase Alpha Technical Notebook” back in the 1970s (which I never did and always regretted not buying) it is revealed that this is in fact the Bergman Cell, a battery to power the gun.

I intend to further augment this model to allow the energy cell to be removed. It will be held in place by smaller rare earth magnets if I can arrange it.

I also intend to figure out a way to make the trigger work. That is, it will depress, probably using two more rare earth magnets, this time to repel each other, for a spring-like feel.

More on this if I ever get to it.

More on that when I do it.

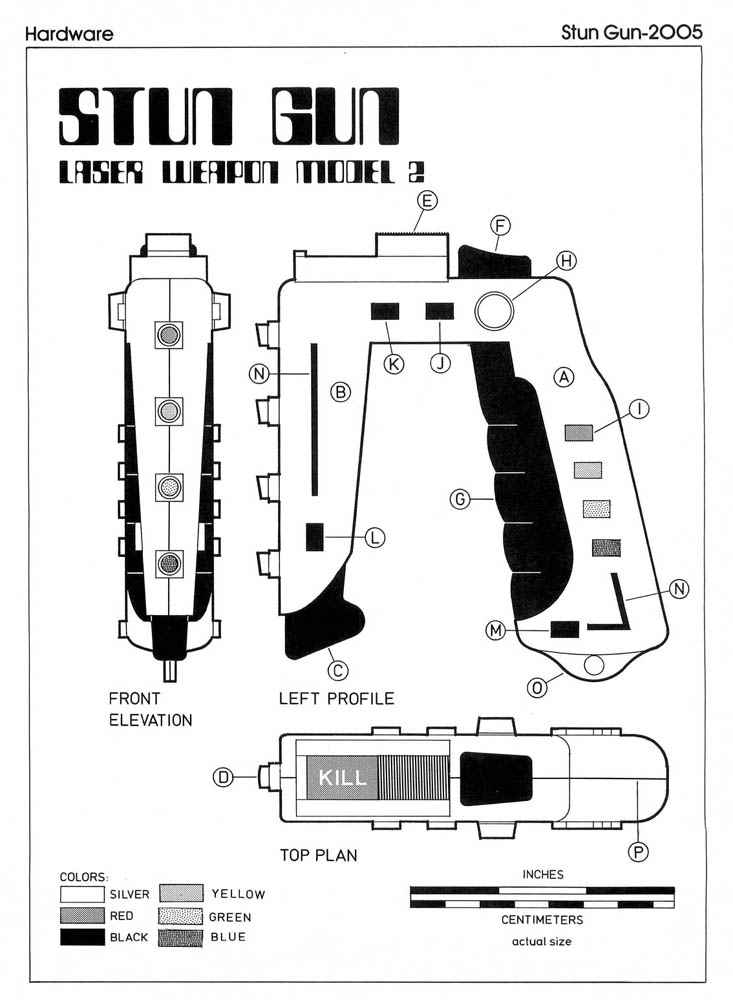
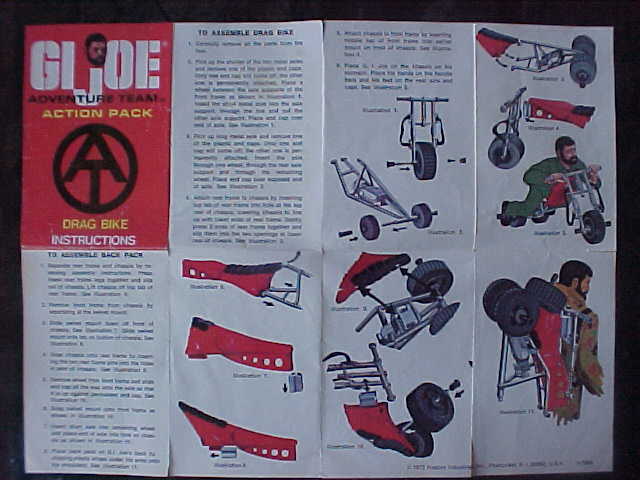
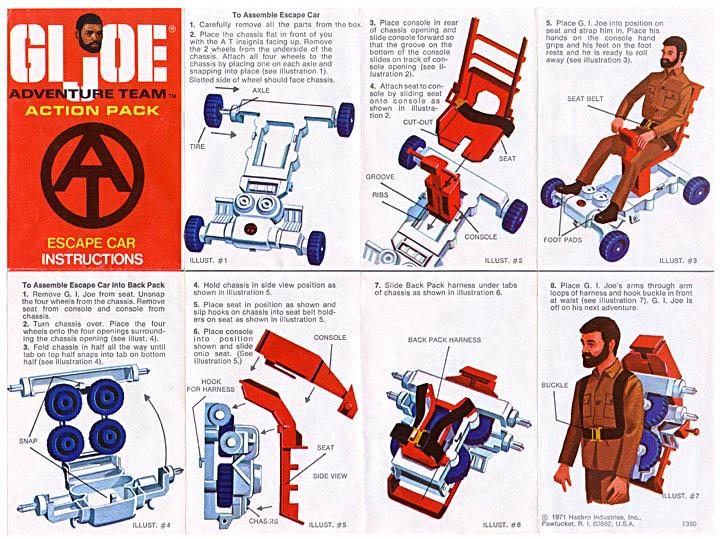
Oh, and here is a scan of the pages referring to the Stun Gun (Model 2) from the “Moonbase Alpha Technical Notebook”:

2005 2004


Bert The Fish

One of my co-workers created a fish for her demo reel, a 3D animated goldfish, which, if I’m to believe her file name, is called “Bert”.

She asked me if I could print Bert for her and I said “I’m pretty sure I could.”

Bert had some issues. The first version suffered from thin fin. The pectoral fins were a bit too thin to print well. I fixed that by thickening them a bit and angling them better.

Bert was modeled to animate, meaning his eyes were spherical and inset into the body in a way that would make printing impossible, so I first sealed off Bert’s eye sockets on his body mesh and then used that shape to cut the spherical eyes out into shapes that would fit into those sockets and I could glue them in place nicely.

Similarly I had to change the mouth a bit and the teeth:

OLYMPUS DIGITAL CAMERA

The irises were printed separately in blue, and the pupils printed in black. This picture is about 2.5 times the size of the real thing (depending on your monitor of course.)

When the fish printed, it had support material to support suspended parts, so it came off the print bed looking like this:

OLYMPUS DIGITAL CAMERA

OLYMPUS DIGITAL CAMERA

I removed it from the bed:

OLYMPUS DIGITAL CAMERA

and then removed all of the support material:

OLYMPUS DIGITAL CAMERA

OLYMPUS DIGITAL CAMERA

I ran a kitchen torch lightly over the surface to change the color of any plastic that touched the support material. That material tends to show some “white” areas. Areas that are lightened by the plastic stress. A quick bit of heat usually changes that back to the native ABS color.

I used clear binary epoxy to glue the eyes and teeth in and here’s the final result:

bert-08 bert-07 bert-06

Tonight’s Work – A Cone and a Fish

One thing I’ve wanted to make with my 3D printer is props for GI Joe. 1:6 scale props. Something we Joe collectors have often wanted is a set of traffic cones. They are infinitely useful in creating realistic street sets for photo shoots.

traffic-cone-01

Today I downloaded one from Thingiverse, but it wasn’t well modeled. I remodeled it entirely, scaling it to a standard 28″ traffic cone, so at 1:6 scale it prints at just under 5 inches.

I printed mine in black, orange and white and glued the pieces together. Here it is standing next to two 12″ Doctor Who figures, in front of a 16″ TARDIS (which I made from foam-core.)

OLYMPUS DIGITAL CAMERA

Also this weekend, besides printing and assembling a first prototype of a Space 1999 Stun Gun, I spent some time posing and remodeling (for print) a model for a co-worker. She created an animated fish and wanted it printed, so I volunteered to print it for her.

I won’t show a picture of the fish until I get her permission to post pics, but I think I can safely show the eyes and teeth. (It is a cartoon fish after all.)

OLYMPUS DIGITAL CAMERA

Space 1999 Stun Gun Progress

My printer is back from the shop. It was three weeks to the day since I sent it. And it’s working.

I tested it by printing a small 1:6 scale Space 1999 Stun Gun for GI Joe. Just a quick print. No cleanup or optimization so it wasn’t perfect. I also found that at 1:6 size, it’s a bit small for a GI Joe hand. Will have to try 1:5.

But I began printing the real parts for my first prototype test print.

Here you see the setting switch housing and switch. The model of the gun I have shows the two colors under the switch as dark brown and red for STUN and KILL. I don’t have a dark brown, and I don’t want to use black. Besides red and green works.

OLYMPUS DIGITAL CAMERA

For this test print the red and green are just thin sheets. I will hopefully eventually carve the words KILL and STUN in them and print those in white.

The slider works nicely. But it’s a bit loose. I’ll have to print a few of those before I get it right, I’m sure. Also, I intend to put a magnet in the slider, and one under each of the colors so the switch will be drawn to the correct position for both STUN and KILL.

Here you also see the four gun barrels, two nubs that are at the top of the gun, and the handle pips in green and red.

Here is the 3D model, with most of the work finished. I just have to etch out holes for the magnets now.

space-1999-stun-gun-model-nearly-done

Update – Sept 21, 2013

Here are all of the parts printed. I kept the black parts on the rafting to keep track of them. Some of them are similar but not identical, so keeping them in this layout helps me place them.

OLYMPUS DIGITAL CAMERA

A while back I bought some rare earth magnets. Very strong but tiny. I decided to put magnets into the slider and under the slider so the sliding switch itself would be attracted to the two switch positions.

I cut holes in the model to accommodate the magnets and attached them to the gun. The attraction is weak from a distance though, so it doesn’t work as nicely as intended for this first prototype.

Here is the first finished model prototype:

OLYMPUS DIGITAL CAMERA


This is a photo of a prop. There are many versions of them, so I’m not sure how accurate it is, but you can see I’ve got it pretty close.

stun-gun

Problems:

I forgot to cut holes for the two upper pips, so these are just glued in place. Also, the front barrel appears to be too short. I will have to check some other models and make adjustments. It’s shorter than my resin model. But it was modeled using a photo of a prop from the internet, so I don’t really know which is more accurate.

The magnets are powerful when close together but weak when far apart. The sliders work, but the attraction can hardly be felt. I’m probably going to go with bigger magnets that I have.

Otherwise for a first attempt, it’s not at all bad.


Tread Bot – Printed on a Form-1

A few weeks ago I had to send my Afinia H479 back to its home for a repair. Nothing major. The heating element for the print bed failed, and was intermittently usable until one day it just stopped working altogether. While I was able to print small things on an unheated bed, large things were impossible. They lifted off the bed ruining the print.

Tomorrow I get it back.

Before I sent it away I did a test to see how small I could create a reasonable little robot, with the final intent of using it as a game piece.

Here’s the result.

OLYMPUS DIGITAL CAMERA

With some changes, I made it better, and I printed it in multiple colors:

OLYMPUS DIGITAL CAMERA

You can see that it printed remarkably well for an additive extrusion printer.

However, Thingiverse user Brian Evans made one using a Form-1, which prints by laser-hardening light-sensitive liquid resin. The resolution is far superior to most home-priced extrusion printers, but they’re also not easily available yet.

Here’s his result:

robotanddodecahedronx1280_preview_featured

I was pretty impressed. This is the first, early version of Treadbot, not the improved one, but you can see by the angles of the body and the curves of every piece that it’s next to impossible to notice any layer striations at all.

My ultimate goal now is to have my Afinia for quick, iterative prototyping and printing larger things, but to have a Form-1 to make model kits I can actually sell.

Today’s Project – Space 1999 Stun Gun

Not going to say much about today’s project, except to say this was one of my favorite Science Fiction weapons when I was a kid. I bought a finished resin model of one some months ago and recently designed and modeled a display stand for it, which you can see here:

stun-gun-display-stand-printed

And here is today’s progress. I was right. Modeling the basic gun body didn’t take much more than an hour with a highly tesselated cylinder and a few lattices applied.

space-1999-stun-gun-model-01

Honestly, all that needs to be done on this model now is to add the trigger and setting slider. Then I just have to make holes for all of the small pieces (which I intend to model in color and glue in place) and print them.

My Latest Project – A GI Joe Backpack Jetpack

As a child, the 1970s GI Joe Adventure Team were some of my favorite toys. For a while, Hasbro made some very nice equipment for Joe that could be broken down and slipped on his back to carry. Some of the gear was practical rescue gear, but some were vehicles.

at-action-back-packs

There was a motor tricycle called the Drag Bike:

at-action-pack-tricycle-instructions

Even a full four-wheeled car-type vehicle, the Escape Car:

at-escape-car

Also there was an Underwater Explorer:

at-underwater-explorer-1

But my absolute favorite, (and I’m not alone) was the GI Joe Turbo Copter.

at-turbo-copter

When the GI Joe View Master reels were released, several of these were seen in use:

joe-a6-large joe-c4-large

In the past decade, Hasbro re-introduced the Turbo Copter in black for a set called Black Spider Rendezvous.

tc-bsr-2

And the GI Joe Collector’s Club re-introduced the Underwater Explorer for the Terror on the Sea Floor Convention set.

terrorseafloor500px

They also made it available in white for individual sale:

at-action-pack-underwater-explorer

The 1970s Adventure Team tradition continued into the re-launch of GI Joe in the late 1980s when the 12″ Hall of Fame GI Joes appeared, and they gave a backpack helicopter to GI Joe’s enemies: Cobra. And the theme continued into the 3.75″ Real American Heroes line.

MY PLAN

A couple of years ago I bought one of the coolest toys ever made – the GI Joe Sigma Six Dragonhawk. It was a large, jet-prop aircraft designed to carry a payload and drop it on the fly, and pick it up later. Rather than use helicopter blades, it used ducted fans, later popularized in the Avatar movie.

Dragonhawk:

dhc-dragonhawk

Here is my page outlining my project which was to convert the Dragonhawk into a substantial backpack vehicle for a 12″ GI Joe.

I never finished the project for a couple of reasons, but here’s how far I got:

dhc-stage-one-complete

What’s missing? A pad for the back, or some kind of seating ledge or seat to support the weight of the pilot, and some kind of harness, as well as support arms. There is also nothing to cover the opening where I cut the cockpit off the body.

New Plan

And now here I am with a 3D color printer. Now I can fairly easily design and print the back-pad, or seat, or harness, or control arms, and the top bit that’s missing. And I probably will, later this year.

But I thought: Now that I have my very own 3D printer, why not just design one from scratch.

So this page is introducing my new project – the GI Joe Adventure Team Action Pack Jetpack!

I began by drawing some basic designs, which included a thumbwheel which would allow the person using this toy to rotate the ducted fan engines. I originally thought of putting a convenient handle on the backpack so a kid could hold it like a gun, using the thumb to rotate the engines, but so far I could not see a way to do that that would just make it look like an add-on that just doesn’t belong. So I figured that, like the Turbo Copter, you could just hold it normally and perhaps use your pointer finger to rotate the engines.

So here’s the first released image of the concept. This has no detail yet, and is just a rough body shape now, which may change completely before I’m done. For now my aim was to make a body that would hold the support arms for the engines, attached to a central thumbwheel to rotate them. This design will be printed in several parts, attached by screws, and should be solid, and support a 12″ GI Joe figure in a harness.

atjp-01-rough-shape-01

I will update this page, or make new pages, as I progress.

Right now my printer has gone to its home for a repair. When I get it back, I will likely test-print some part of this. By then I hope to have the basic axle and thumbwheel mechanism fully modeled and fitted into the body correctly so that when the printer gets back, I can print a fully working prototype, even if the detail won’t yet be there.